- Version: 6.2.31
- GitHub: https://github.com/nativescript-community/ui-mapbox
- NPM: https://www.npmjs.com/package/%40nativescript-community%2Fui-mapbox
- Downloads:
- Last Day: 23
- Last Week: 62
- Last Month: 366
@nativescript-community/ui-mapbox
![]()
![]()
Interactive, thoroughly customizable maps powered by vector tiles and OpenGL.
Table of Contents
- Prerequisites
- Installation
- Configuration
- Issues
- Usage
- API
- Markers
- Viewport
- Declaring Programmatically
- Methods
- show
- hide
- unhide
- destroy 💥
- setMapStyle
- addMarkers
- Updating markers
- removeMarkers
- setViewport
- getViewport
- setCenter
- getCenter
- setZoomLevel
- getZoomLevel
- animateCamera
- setTilt (Android only)
- getTilt (Android only)
- getUserLocation
- trackUser
- addSource
- removeSource
- addLayer
- removeLayer
- queryRenderedFeatures
- querySourceFeatures
- addLinePoint
- addPolygon (deprecated, use addLayer() instead)
- removePolygons
- addPolyline
- removePolylines
- setOnMapClickListener
- setOnMapLongClickListener
- setOnScrollListener
- Offline maps
- Permissions
- Using marker images from the internet
- Demos and Development
- Contributing
- Questions
Prerequisites
You either need your own tile server such as the one provided by openmaptiles.org or a Mapbox API access token (they have a 🆓 Starter plan!), so sign up with Mapbox. Once you've registered go to your Account > Apps > New token. The 'Default Secret Token' is what you'll need.
Android
Mapbox now requires (version > 8.6.6) an api key to download the sdk
If you want to use newer version than the default 8.6.6 you need to add this to your app.gradle
allprojects {
  repositories {
       maven {
        url 'https://api.mapbox.com/downloads/v2/releases/maven'
        authentication {
            basic(BasicAuthentication)
        }
        credentials {
            // Do not change the username below.
            // This should always be `mapbox` (not your username).
            username = 'mapbox'
            // Use the secret token you stored in gradle.properties as the password
            password = project.properties['MAPBOX_DOWNLOADS_TOKEN'] ?: ""
        }
    }
  }
}
Installation
Run the following command from the root of your project:
ns plugin add @nativescript-community/ui-mapbox
Configuration
Add any other additional configuration instructions here.
Issues
If you get an error during iOS build related to Podspec versions, probably the easiest fix is:
ns platform remove ios and ns platform add ios.
On Android the plugin adds this to the <application> node of app/App_Resources/Android/AndroidManifest.xml (the plugin already attempts to do so):
<service android:name="com.mapbox.services.android.telemetry.service.TelemetryService" />If you get an error related to TelemetryService then please check it's there.
Usage
XML
You can instantiate a map from JS or TS. As the map is yet another view component it will play nice with any NativeScript layout you throw it in. You can also easily add multiple maps to the same page or to different pages in any layout you like.
A simple layout could look like this:
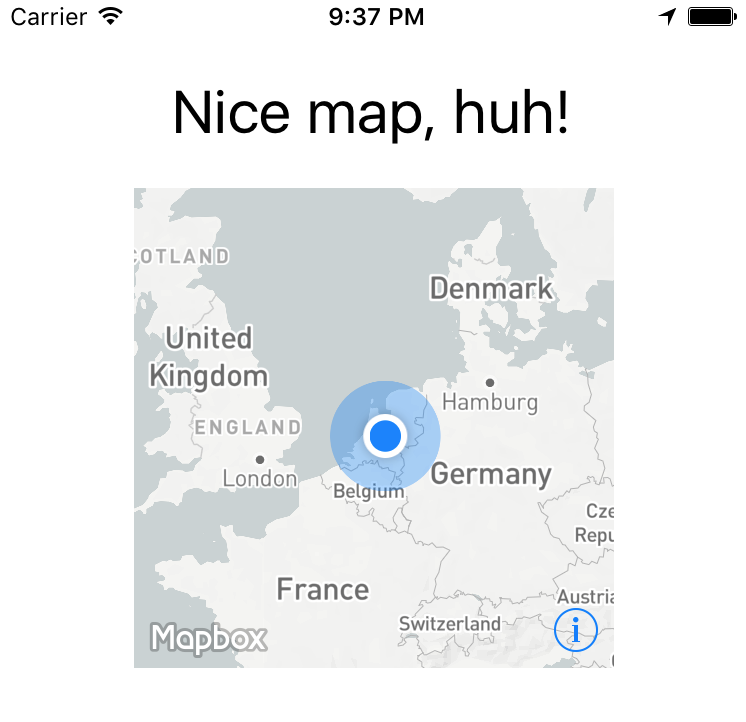
Could be rendered by a definition like this:
<Page xmlns="http://schemas.nativescript.org/tns.xsd" xmlns:map="@nativescript-community/ui-mapbox" navigatingTo="navigatingTo">
  <StackLayout>
    <Label text="Nice map, huh!" class="title"/>
    <ContentView height="240" width="240">
      <map:MapboxView
          accessToken="your_token"
          mapStyle="traffic_night"
          latitude="52.3702160"
          longitude="4.8951680"
          zoomLevel="3"
          showUserLocation="true"
          mapReady="onMapReady">
      </map:MapboxView>
    </ContentView>
  </StackLayout>
</Page>
Angular
Component:
import { registerElement } from '@nativescript/angular';
registerElement("Mapbox", () => require("@nativescript-community/ui-mapbox").MapboxView);
View:
  <ContentView height="100%" width="100%">
    <Mapbox
        accessToken="your_token"
        mapStyle="traffic_day"
        latitude="50.467735"
        longitude="13.427718"
        hideCompass="true"
        zoomLevel="18"
        showUserLocation="false"
        disableZoom="false"
        disableRotation="false"
        disableScroll="false"
        disableTilt="false"
        (mapReady)="onMapReady($event)">
    </Mapbox>
  </ContentView>
API
All currently supported options for your XML based map are (don't use other properties - if you need styling wrap the map in a ContentView and apply things like width to that container!):
| option | default | description |
|---|---|---|
accesstoken |
- | see 'Prerequisites' above |
delay |
0 | A delay in milliseconds - you can set this to have better control over when Mapbox is invoked so it won't clash with other computations your app may need to perform. |
mapStyle |
streets | streets, light, dark, satellite_streets, satellite, traffic_day, traffic_night, an URL starting with mapbox:// or pointing to a custom JSON definition (http://, https://, or local relative to nativescript app path ~/) |
latitude |
- | Set the center of the map by passing this in |
longitude |
- | .. and this as well |
zoomLevel |
0 | 0-20 |
showUserLocation |
false | Requires location permissions on Android which you can remove from AndroidManifest.xml if you don't need them |
hideCompass |
false | Don't show the compass in the top right corner during rotation of the map |
hideLogo |
false | Mapbox requires false if you're on a free plan |
hideAttribution |
true | Mapbox requires false if you're on a free plan |
disableZoom |
false | Don't allow the user to zoom in or out (pinch and double-tap) |
disableRotation |
false | Don't allow the user to rotate the map (two finger gesture) |
disableScroll |
false | Don't allow the user to move the center of the map (one finger drag) |
disableTilt |
false | Don't allow the user to tilt the map (two finger drag up or down) |
mapReady |
- | The name of a callback function you can declare to interact with the map after it has been drawn |
moveBeginEvent |
- | The name of a function to be called when the map has begun to move. |
moveEndEvent |
- | The name of a function to be called when the map has completed moving. |
locationPermissionGranted |
- | The name of a callback function you can declare to get notified when the user granted location permissions |
locationPermissionDenied |
- | The name of a callback function you can declare to get notified when the user denied location permissions (will never fire on iOS because there's nothing to deny) |
Markers
This is where that last option in the table above comes in - mapReady.
It allows you to interact with the map after it has been drawn to the page.
Open main-page.[js|ts] and add this (see addMarkers further below for the full marker API):
var mapbox = require("@nativescript-community/ui-mapbox");

function onMapReady(args) {
  // you can tap into the native MapView objects (MGLMapView for iOS and com.mapbox.mapboxsdk.maps.MapView for Android)
  var nativeMapView = args.ios ? args.ios : args.android;
  console.log("Mapbox onMapReady for " + (args.ios ? "iOS" : "Android") + ", native object received: " + nativeMapView);

  // .. or use the convenience methods exposed on args.map, for instance:
  args.map.addMarkers([
    {
      lat: 52.3602160,
      lng: 4.8891680,
      title: 'One-line title here',
      subtitle: 'Really really nice location',
      selected: true, // makes the callout show immediately when the marker is added (note: only 1 marker can be selected at a time)
      onCalloutTap: function(){console.log("'Nice location' marker callout tapped");}
    }]
  );
}

exports.onMapReady = onMapReady;
Viewport
var mapbox = require("@nativescript-community/ui-mapbox");

function onMapReady(args) {
  args.map.setViewport(
      {
        bounds: {
          north: 52.4820,
          east: 5.1087,
          south: 52.2581,
          west: 4.6816
        },
        animated: true
      }
  );
}

exports.onMapReady = onMapReady;
The methods you can invoke like this from an XML-declared map are:
addMarkers, setViewport, removeMarkers, getCenter, setCenter, getZoomLevel, setZoomLevel, getViewport, getTilt, setTilt, setMapStyle, animateCamera, addPolygon, removePolygons, addPolyline, removePolylines, getUserLocation, trackUser, setOnMapClickListener, setOnMapLongClickListener and destroy.
Check out the usage details on the functions below.
Declaring Programmatically
Add a container to your view XML where you want to programmatically add the map. Give it an id.
<ContentView id="mapContainer" />Methods
show
    const contentView : ContentView = <ContentView>page.getViewById( 'mapContainer' );

    const settings = {

      // NOTE: passing in the container here.

      container: contentView,
      accessToken: ACCESS_TOKEN,
      style: MapStyle.LIGHT,
      margins: {
        left: 18,
        right: 18,
        top: isIOS ? 390 : 454,
        bottom: isIOS ? 50 : 8
      },
      center: {
        lat: 52.3702160,
        lng: 4.8951680
      },
      zoomLevel: 9, // 0 (most of the world) to 20, default 0
      showUserLocation: true, // default false
      hideAttribution: true, // default false
      hideLogo: true, // default false
      hideCompass: false, // default false
      disableRotation: false, // default false
      disableScroll: false, // default false
      disableZoom: false, // default false
      disableTilt: false, // default false
      markers: [
        {
          id: 1,
          lat: 52.3732160,
          lng: 4.8941680,
          title: 'Nice location',
          subtitle: 'Really really nice location',
          iconPath: 'res/markers/green_pin_marker.png',
          onTap: () => console.log("'Nice location' marker tapped"),
          onCalloutTap: () => console.log("'Nice location' marker callout tapped")
        }
      ]
    };

    console.log( "main-view-model:: doShow(): creating new MapboxView." );

    const mapView = new MapboxView();

    // Bind some event handlers onto our newly created map view.

    mapView.on( 'mapReady', ( args : any ) => {

      console.log( "main-view-model: onMapReady fired." );

      // this is an instance of class MapboxView

      this.mapboxView = args.map;

      // get a reference to the Mapbox API shim object so we can directly call its methods.

      this.mapbox = this.mapboxView.getMapboxApi();

      this.mapbox.setOnMapClickListener( point => {
        console.log(`>> Map clicked: ${JSON.stringify(point)}`);
        return true;
      });

      this.mapbox.setOnMapLongClickListener( point => {
        console.log(`>> Map longpressed: ${JSON.stringify(point)}`);
        return true;
      });

      this.mapbox.setOnScrollListener((point: LatLng) => {
        // console.log(`>> Map scrolled`);
      });

      this.mapbox.setOnFlingListener(() => {
        console.log(`>> Map flinged"`);
      }).catch( err => console.log(err) );

    });

    mapView.setConfig( settings );
    contentView.content = mapView;
hide
All further examples assume mapbox has been required.
Also, all functions support promises, but we're leaving out the .then() stuff for brevity where it doesn't add value.
mapbox.hide();unhide
If you previously called hide() you can quickly unhide the map,
instead of redrawing it (which is a lot slower and you loose the viewport position, etc).
mapbox.unhide();destroy 💥
To clean up the map entirely you can destroy instead of hide it:
mapbox.destroy();setMapStyle
You can update the map style after you've loaded it.
With Mapbox Android SDK 6.1.x (used in plugin version 4.1.0) I've seen Android crash a few seconds after this has been used, so test this well and perhaps don't use it when in doubt.
mapbox.setMapStyle(mapbox.MapStyle.DARK);addMarkers
  import { MapboxMarker } from "@nativescript-community/ui-mapbox";

  const firstMarker = <MapboxMarker>{ //cast as a MapboxMarker to pick up helper functions such as update()
    id: 2, // can be user in 'removeMarkers()'
    lat: 52.3602160, // mandatory
    lng: 4.8891680, // mandatory
    title: 'One-line title here', // no popup unless set
    subtitle: 'Infamous subtitle!',
    // icon: 'res://cool_marker', // preferred way, otherwise use:
    icon: 'http(s)://website/coolimage.png', // from the internet (see the note at the bottom of this readme), or:
    iconPath: '~/assets/markers/home_marker.png',
    selected: true, // makes the callout show immediately when the marker is added (note: only 1 marker can be selected at a time)
    onTap: marker => console.log("Marker tapped with title: '" + marker.title + "'"),
    onCalloutTap: marker => alert("Marker callout tapped with title: '" + marker.title + "'")
  };

  mapbox.addMarkers([
    firstMarker,
    {
      // more markers..
    }
  ])
Updating markers
Plugin version 4.2.0 added the option to update makers. Just call update on the MapboxMarker reference you created above.
You can update the following properties (all but the icon really):
  firstMarker.update({
    lat: 52.3622160,
    lng: 4.8911680,
    title: 'One-line title here (UPDATE)',
    subtitle: 'Updated subtitle',
    selected: true, // this will trigger the callout upon update
    onTap: (marker: MapboxMarker) => console.log(`UPDATED Marker tapped with title: ${marker.title}`),
    onCalloutTap: (marker: MapboxMarker) => alert(`UPDATED Marker callout tapped with title: ${marker.title}`)
  })
removeMarkers
You can either remove all markers by not passing in an argument, or remove specific marker id's (which you specified previously).
  // remove all markers
  mapbox.removeMarkers();

  // remove specific markers by id
  mapbox.removeMarkers([1, 2]);
setViewport
If you want to for instance make the viewport contain all markers you can set the bounds to the lat/lng of the outermost markers using this function.
  mapbox.setViewport(
      {
        bounds: {
          north: 52.4820,
          east: 5.1087,
          south: 52.2581,
          west: 4.6816
        },
        animated: true // default true
      }
  )
getViewport
  mapbox.getViewport().then(
      function(result) {
        console.log("Mapbox getViewport done, result: " + JSON.stringify(result));
      }
  )
setCenter
  mapbox.setCenter(
      {
        lat: 52.3602160, // mandatory
        lng: 4.8891680, // mandatory
        animated: false // default true
      }
  )
getCenter
Here the promise callback makes sense, so adding it to the example:
  mapbox.getCenter().then(
      function(result) {
        console.log("Mapbox getCenter done, result: " + JSON.stringify(result));
      },
      function(error) {
        console.log("mapbox getCenter error: " + error);
      }
  )
setZoomLevel
  mapbox.setZoomLevel(
      {
        level: 6.5, // mandatory, 0-20
        animated: true // default true
      }
  )
getZoomLevel
  mapbox.getZoomLevel().then(
      function(result) {
        console.log("Mapbox getZoomLevel done, result: " + JSON.stringify(result));
      },
      function(error) {
        console.log("mapbox getZoomLevel error: " + error);
      }
  )
animateCamera
  // this is a boring triangle drawn near Amsterdam Central Station
  mapbox.animateCamera({
    // this is where we animate to
    target: {
        lat: 52.3732160,
        lng: 4.8941680
    },
    zoomLevel: 17, // Android
    altitude: 2000, // iOS (meters from the ground)
    bearing: 270, // Where the camera is pointing, 0-360 (degrees)
    tilt: 50,
    duration: 5000 // default 10000 (milliseconds)
  })
setTilt (Android only)
  mapbox.setTilt(
      {
        tilt: 40, // default 30 (degrees angle)
        duration: 4000 // default 5000 (milliseconds)
      }
  )
getTilt (Android only)
  mapbox.getTilt().then(
      function(tilt) {
        console.log("Current map tilt: " +  tilt);
      }
  )
getUserLocation
If the user's location is shown on the map you can get their coordinates and speed:
  mapbox.getUserLocation().then(
      function(userLocation) {
        console.log("Current user location: " +  userLocation.location.lat + ", " + userLocation.location.lng);
        console.log("Current user speed: " +  userLocation.speed);
      }
  )
trackUser
In case you're showing the user's location, you can have the map track the position. The map will continuously move along with the last known location.
  mapbox.trackUser({
    mode: "FOLLOW_WITH_HEADING", // "NONE" | "FOLLOW" | "FOLLOW_WITH_HEADING" | "FOLLOW_WITH_COURSE"
    animated: true
  });
addSource
https://docs.mapbox.com/mapbox-gl-js/api/#map#addsource
Supported source types:
- Vector
- GeoJson
- Raster
Adds a vector to GeoJSON source to the map.
  mapbox.addSource( id, {
    type: 'vector',
    url: 'url to source'
  } );
-or-
  mapbox.addSource( id, {
    'type': 'geojson',
    'data': {
      "type": "Feature",
        "geometry": {
        "type": "LineString",
          "coordinates": [ [ lng, lat ], [ lng, lat ], ..... ]
        }
      }
    }
  );
removeSource
Remove a source by id
mapbox.removeSource( id );addLayer
https://docs.mapbox.com/mapbox-gl-js/style-spec/#layers
Supported layer types:
- Line
- Circle
- Fill
- Symbol
- Raster
To add a line:
  mapbox.addLayer({
    'id': someid,
    'type': 'line',
    'source': {
      'type': 'geojson',
      'data': {
        "type": "Feature",
          "geometry": {
          "type": "LineString",
            "coordinates": [ [ lng, lat ], [ lng, lat ], ..... ]
          }
        }
      }
    },
    'layout': {
      'line-cap': 'round',
      'line-join': 'round'
    },
    'paint': {
      'line-color': '#ed6498',
      'line-width': 5,
      'line-opacity': .8,
      'line-dash-array': [ 1, 1, 1, ..]
    }
  });
To add a circle:
  mapbox.addLayer({
    "id": someid,
    "type": 'circle',
    "source": {
      "type": 'geojson',
      "data": {
        "type": "Feature",
        "geometry": {
          "type": "Point",
          "coordinates": [ lng, lat ]
        }
      }
    },
    "paint": {
      "circle-radius": {
        "stops": [
          [0, 0],
          [20, 8000 ]
        ],
        "base": 2
      },
      'circle-opacity': 0.05,
      'circle-color': '#ed6498',
      'circle-stroke-width': 2,
      'circle-stroke-color': '#ed6498'
    }
  });
Source may be a geojson or vector source description or may be the id of a source added using addSource()
removeLayer
Remove a layer added with addLayer() by id.
mapbox.removeLayer( id );queryRenderedFeatures
https://docs.mapbox.com/mapbox-gl-js/api/map/#map#queryrenderedfeatures Returns an array of GeoJSON Feature objects representing visible features that satisfy the query parameters.
mapbox
  .queryRenderedFeatures({
    point: {
      lat: 52.3701494345567,
      lng: 4.823684692382513,
  	},
    layers: ['circle-with-source-object'],
    filter: ['==', ['get', 'querySample'], '2'],
  })
  .then((result) => console.log('query rendered features', result))
querySourceFeatures
https://docs.mapbox.com/mapbox-gl-js/api/map/#map#querysourcefeatures Returns an array of GeoJSON Feature objects representing features within the specified vector tile or GeoJSON source that satisfy the query parameters.
mapbox
  .querySourceFeatures('source_id', { filter: ['==', ['get', 'querySample'], '2'] })
  .then((result) => console.log('query source features', result));
addLinePoint
Dynamically add a point to a line.
mapbox.addLinePoint( <id of line layer>, lnglat )where lnglat is an array of two points, a longitude and a latitude.
addPolygon (deprecated, use addLayer() instead)
Draw a shape. Just connect the dots like we did as a toddler.
The first person to tweet a snowman drawn with this function gets a T-shirt (from @eddyverbruggen ;-)).
  // after adding this, scroll to Amsterdam to see a semi-transparent red square
  mapbox.addPolygon(
      {
        id: 1, // optional, can be used in 'removePolygons'
        fillColor: new Color("red"),
        fillOpacity: 0.7,

        // stroke-related properties are only effective on iOS
        strokeColor: new Color("green"),
        strokeWidth: 8,
        strokeOpacity: 0.5,

        points: [
          {
            lat: 52.3923633970718,
            lng: 4.902648925781249
          },
          {
            lat: 52.35421556258807,
            lng: 4.9308013916015625
          },
          {
            lat: 52.353796172573944,
            lng: 4.8799896240234375
          },
          {
            lat: 52.3864966440161,
            lng: 4.8621368408203125
          },
          {
            lat: 52.3923633970718,
            lng: 4.902648925781249
          }
        ]
      })
      .then(result => console.log("Mapbox addPolygon done"))
      .catch((error: string) => console.log("mapbox addPolygon error: " + error));
removePolygons
You can either remove all polygons by not passing in an argument, or remove specific polygon id's (which you specified previously).
  // remove all polygons
  mapbox.removePolygons();

  // remove specific polygons by id
  mapbox.removePolygons([1, 2]);
addPolyline
Deprecated. Use addLayer() instead.
Draw a polyline. Connect the points given as parameters.
  // Draw a two segment line near Amsterdam Central Station
  mapbox.addPolyline({
      id: 1, // optional, can be used in 'removePolylines'
      color: '#336699', // Set the color of the line (default black)
      width: 7, // Set the width of the line (default 5)
      opacity: 0.6, //Transparency / alpha, ranging 0-1. Default fully opaque (1).
      points: [
          {
              'lat': 52.3833160, // mandatory
              'lng': 4.8991780 // mandatory
          },
          {
              'lat': 52.3834160,
              'lng': 4.8991880
          },
          {
              'lat': 52.3835160,
              'lng': 4.8991980
          }
      ]
  });
removePolylines
Deprecated. Use removeLayer() instead.
You can either remove all polylines by not passing in an argument, or remove specific polyline id's (which you specified previously).
  // remove all polylines
  mapbox.removePolylines();

  // remove specific polylines by id
  mapbox.removePolylines([1, 2]);
setOnMapClickListener
Add a listener to retrieve lat and lng of where the user taps the map (not a marker).
  mapbox.setOnMapClickListener((point: LatLng) => {
    console.log("Map clicked at latitude: " + point.lat + ", longitude: " + point.lng);
  });
setOnMapLongClickListener
Add a listener to retrieve lat and lng of where the user longpresses the map (not a marker).
  mapbox.setOnMapLongClickListener((point: LatLng) => {
    console.log("Map longpressed at latitude: " + point.lat + ", longitude: " + point.lng);
  });
setOnScrollListener
Add a listener to retrieve lat and lng of where the user scrolls to on the map.
  mapbox.setOnScrollListener((point?: LatLng) => {
    console.log("Map scrolled to latitude: " + point.lat + ", longitude: " + point.lng);
  });
Offline maps
For situations where you want the user to pre-load certain regions you can use these methods to create and remove offline regions.
Important read: the offline maps documentation by Mapbox.
downloadOfflineRegion
This example downloads the region 'Amsterdam' on zoom levels 9, 10 and 11 for map style 'outdoors'.
  mapbox.downloadOfflineRegion(
    {
      accessToken: accessToken, // required for Android in case no map has been shown yet
      name: "Amsterdam", // this name can be used to delete the region later
      style: mapbox.MapStyle.OUTDOORS,
      minZoom: 9,
      maxZoom: 11,
      bounds: {
        north: 52.4820,
        east: 5.1087,
        south: 52.2581,
        west: 4.6816
      },
      // this function is called many times during a download, so
      // use it to show an awesome progress bar!
      onProgress: function (progress) {
        console.log("Download progress: " + JSON.stringify(progress));
      }
    }
  ).then(
    function() {
      console.log("Offline region downloaded");
    },
    function(error) {
      console.log("Download error: " + error);
    }
  );
Advanced example: download the current viewport
Grab the viewport with the mapbox.getViewport() function and download it at various zoom levels:
  // I spare you the error handling on this one..
  mapbox.getViewport().then(function(viewport) {
    mapbox.downloadOfflineRegion(
      {
        name: "LastViewport", // anything you like really
        style: mapbox.MapStyle.LIGHT,
        minZoom: viewport.zoomLevel,
        maxZoom: viewport.zoomLevel + 2, // higher zoom level is lower to the ground
        bounds: viewport.bounds,
        onProgress: function (progress) {
          console.log("Download %: " + progress.percentage);
        }
      }
    );
  });
listOfflineRegions
To help you manage offline regions there's a listOfflineRegions function you can use. You can then fi. call deleteOfflineRegion (see below) and pass in the name to remove any cached region(s) you like.
  mapbox.listOfflineRegions({
    // required for Android in case no map has been shown yet
    accessToken: accessToken
  }).then(
    function(regions) {
      console.log(JSON.stringify(JSON.stringify(regions));
    },
    function(error) {
      console.log("Error while listing offline regions: " + error);
    }
  );
deleteOfflineRegion
You can remove regions you've previously downloaded. Any region(s) matching the name param will be removed locally.
  mapbox.deleteOfflineRegion({
    name: "Amsterdam"
  }).then(
    function() {
      console.log("Offline region deleted");
    },
    function(error) {
      console.log("Error while deleting an offline region: " + error);
    }
  );
Permissions
hasFineLocationPermission / requestFineLocationPermission
On Android 6 you need to request permission to be able to show the user's position on the map at runtime when targeting API level 23+.
Even if the uses-permission tag for ACCESS_FINE_LOCATION is present in AndroidManifest.xml.
You don't need to do this with plugin version 2.4.0+ as permission is request when required while rendering the map. You're welcome :)
Note that hasFineLocationPermission will return true when:
- You're running this on iOS, or
- You're targeting an API level lower than 23, or
- You're using Android < 6, or
- You've already granted permission.
  mapbox.hasFineLocationPermission().then(
      function(granted) {
        // if this is 'false' you probably want to call 'requestFineLocationPermission' now
        console.log("Has Location Permission? " + granted);
      }
  );

  // if no permission was granted previously this will open a user consent screen
  mapbox.requestFineLocationPermission().then(
      function() {
        console.log("Location permission requested");
      }
  );
Note that the show function will also check for permission if you passed in showUserLocation : true.
If you didn't request permission before showing the map, and permission was needed, the plugin will ask the user permission while rendering the map.
Using marker images from the internet
If you specify icon: 'http(s)://some-remote-image', then on iOS you'll need to whitelist
the domain. Google for iOS ATS for detailed options, but for a quick test you can add this to
app/App_Resources/iOS/Info.plist:
	<key>NSAppTransportSecurity</key>
	<dict>
        <key>NSAllowsArbitraryLoads</key>
        <true/>
	</dict>
Demos and Development
Repo Setup
The repo uses submodules. If you did not clone with --recursive then you need to call
git submodule update --initThe package manager used to install and link dependencies must be pnpm or yarn. npm wont work.
To develop and test:
if you use yarn then run yarn
if you use pnpm then run pnpm i
Interactive Menu:
To start the interactive menu, run npm start (or yarn start or pnpm start). This will list all of the commonly used scripts.
Build
npm run build.allWARNING: it seems yarn build.all wont always work (not finding binaries in node_modules/.bin) which is why the doc explicitly uses npm run
Demos
npm run demo.[ng|react|svelte|vue].[ios|android]

npm run demo.svelte.ios # Example
Demo setup is a bit special in the sense that if you want to modify/add demos you dont work directly in demo-[ng|react|svelte|vue]
Instead you work in demo-snippets/[ng|react|svelte|vue]
You can start from the install.ts of each flavor to see how to register new demos
Contributing
Update repo
You can update the repo files quite easily
First update the submodules
npm run updateThen commit the changes Then update common files
npm run syncThen you can run yarn|pnpm, commit changed files if any
Update readme
npm run readmeUpdate doc
npm run docPublish
The publishing is completely handled by lerna (you can add -- --bump major to force a major release)
Simply run
npm run publishmodifying submodules
The repo uses https:// for submodules which means you won't be able to push directly into the submodules.
One easy solution is t modify ~/.gitconfig and add
[url "ssh://[email protected]/"]
	pushInsteadOf = https://github.com/
Questions
If you have any questions/issues/comments please feel free to create an issue or start a conversation in the NativeScript Community Discord.