- Version: 3.0.1
- GitHub: https://github.com/nativescript-community/universal-links
- NPM: https://www.npmjs.com/package/%40nativescript-community%2Funiversal-links
- Downloads:
- Last Day: 55
- Last Week: 332
- Last Month: 1457
@nativescript-community/universal-links
Universal links (IOS) and App Links (Android) support for NativeScript.
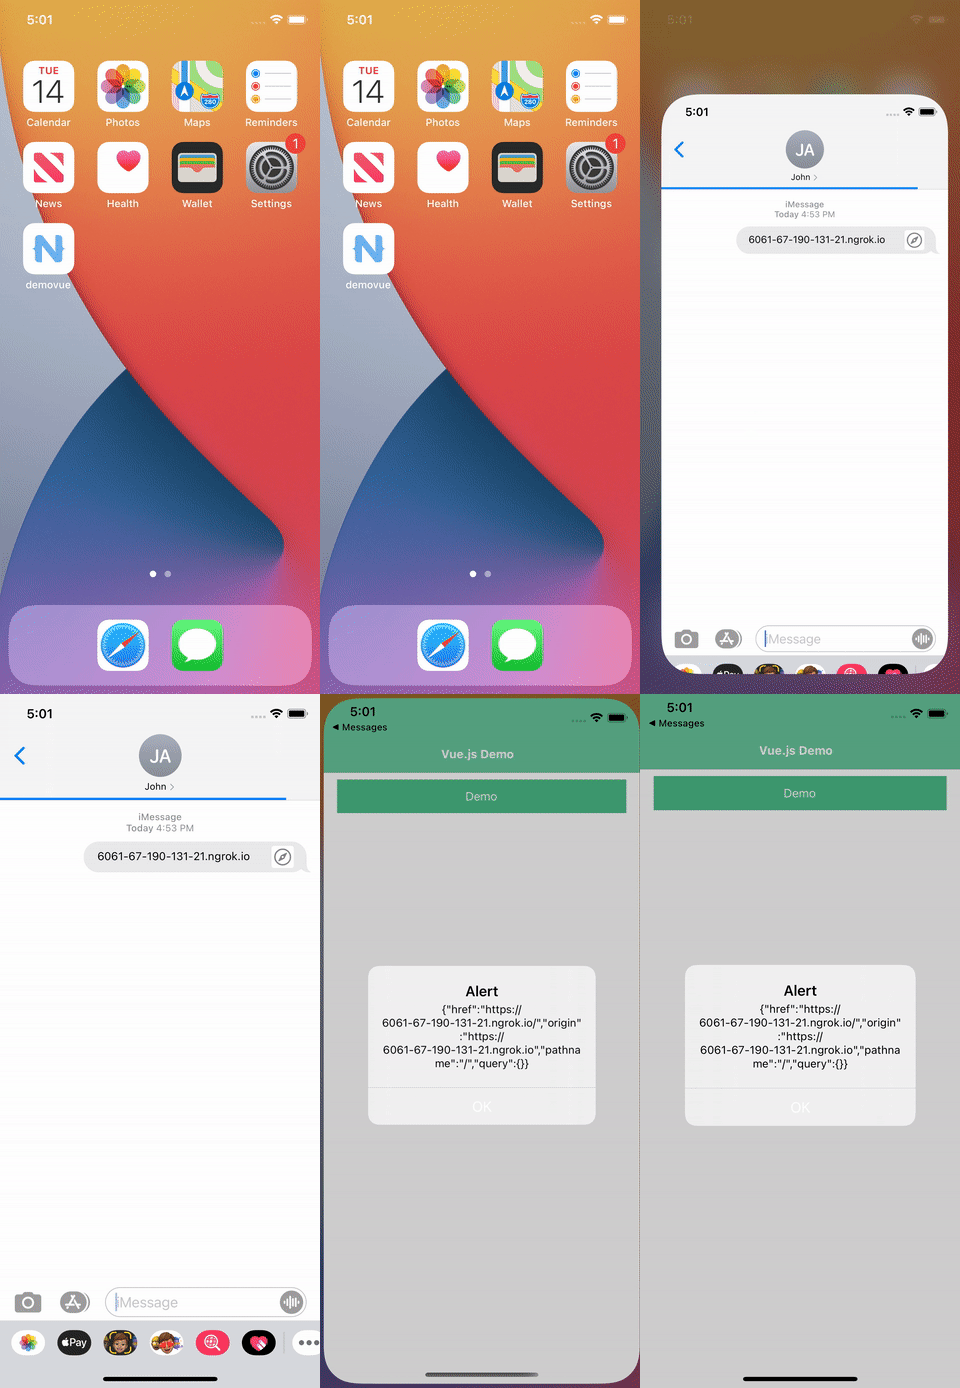
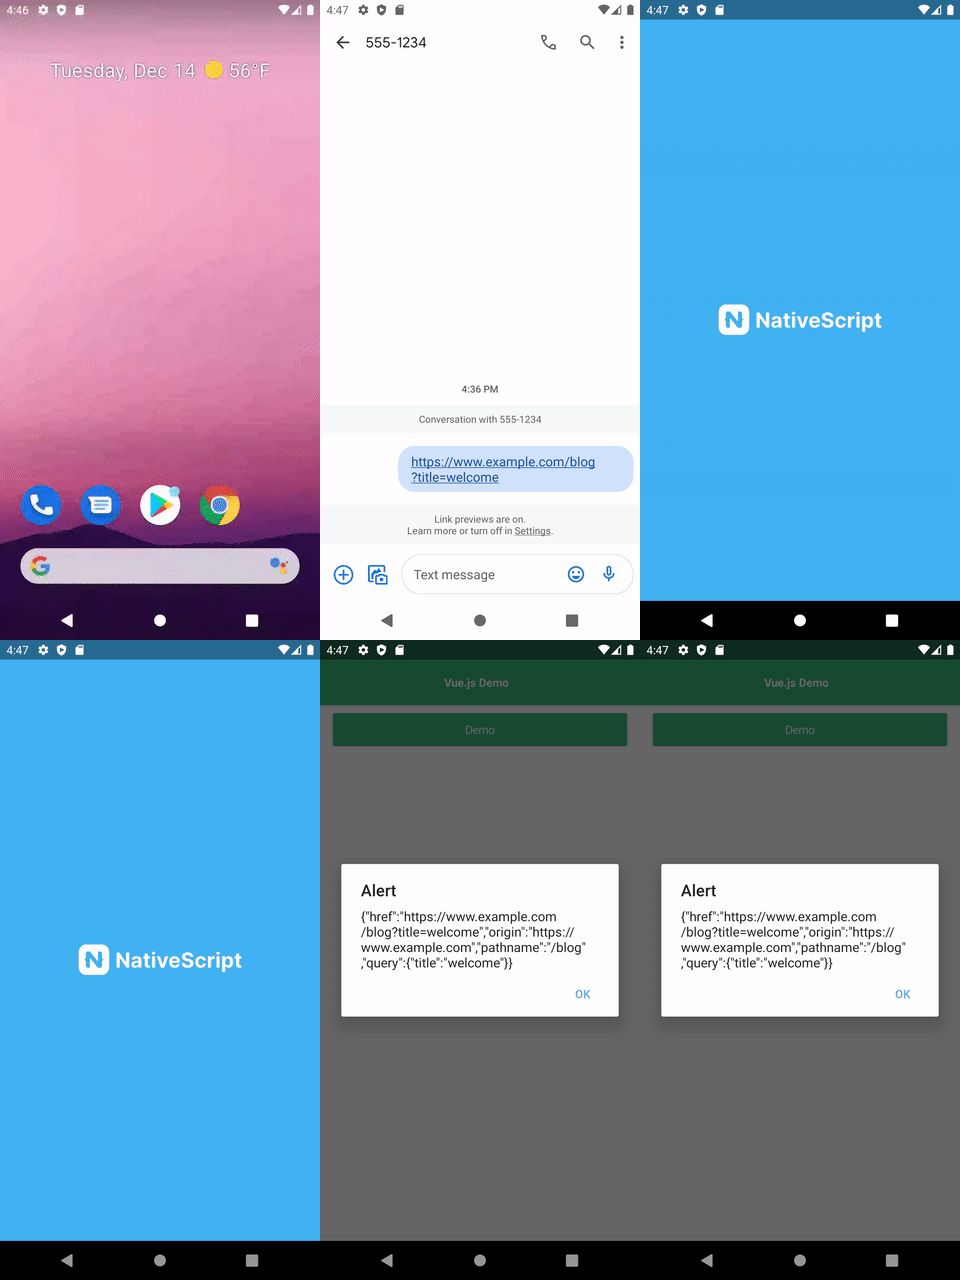
When a user clicks a link to a website, it opens in the default web browser (Safari/Chrome). Universal linking allows your app to open instead of the web browser.
Apple calls this Universal Links and Google calls it App Links, but they mean the same thing.
 |
 |
|---|---|
| iOS Demo | Android Demo |
Migration to 3.x
In version 3.0.0 the returned object is now simply the link as a string. It is not "parsed" anymore. The reason for that is that url-parse package used for this is pretty huge and not needed by most.
You can still parse like so:
import * as urlparse from 'url-parse';

function parseLink(link: string) {
  const url = urlparse(link, true);
  return {
    href: url.href,
    origin: url.origin
    pathname: url.pathname,
    query: url.query
  }

}
Table of Contents
- Migration to 3.x
- Installation
- Implementing Universal Links
- Usage
- Demos and Development
- Contributing
- Questions
Installation
Run the following command from the root of your project:
ns plugin add @nativescript-community/universal-links
Implementing Universal Links
Both iOS (9.0 and newer) and Android (all versions) provide good APIs for universal linking.
iOS
Apple introduced a new deep linking API in iOS 9.0 called “Universal Links”. It provides a better user experience than the hacky deep linking options that existed in iOS 8.0 and below.
First step is to add a file to the root of your website called apple-app-site-association. This is a JSON file and it looks like this:
{
    "applinks": {
        "apps": [],
        "details": [
            {
                "appID": "TEAM_ID.BUNDLE_ID", // ex: "9JA89QQLNQ.com.apple.wwdc"
                "paths": [ "/blog/*"]
            }
        ]
    }
}- This file will be downloaded automatically by every single user that installs or upgrades your iOS app.
- It MUST be served over HTTPS with a valid SSL certificate. If you need to test this, I recommend using https://ngrok.io.
- This file is only fetched once when the user first installs or upgrades the app. It must live on your website before your app is released. This also means that you can’t add new deep linking url patterns to your app until you push out a new app update to force users to refresh the file.
- I suggest using this Apple App Site Association (AASA) Validator to confirm your
apple-app-site-associationis correct.
Check out Apples' docs for more info.
Next, you need to add the Associated Domains to your IOS project, either using XCode or manually adding the following code to your App_Resources/IOS/app.entitlements file. Please note the applinks: prefix, it won't work without it.
<?xml version="1.0" encoding="UTF-8"?>
<!DOCTYPE plist PUBLIC "-//Apple//DTD PLIST 1.0//EN" "http://www.apple.com/DTDs/PropertyList-1.0.dtd">
<plist version="1.0">
  <dict>
    <key>com.apple.developer.associated-domains</key>
    <array>
      <string>applinks:www.example.com</string>
    </array>
  </dict>
</plist>
Android
In Android, universal linking is implemented using Intent Filters. By adding a BROWSABLE intent filter, you are saying that your app can be started by a user clicking on a website url.
You don't need any server side changes for Android, only modify your app to add the Intent Filter.
Add this code to your App_Resources/Android/src/main/AndroidManifest.xml file:
<activity
    android:name="com.tns.NativeScriptActivity"
    android:label="@string/title_activity_kimera" >

    <!-- Add this new section to your Activity -->
    <intent-filter>
        <action android:name="android.intent.action.VIEW" />
        <category android:name="android.intent.category.DEFAULT" />
        <category android:name="android.intent.category.BROWSABLE" />

        <!-- Handle urls starting with "https://www.example.com/blog" -->
        <data android:scheme="https"
              android:host="www.example.com"
              android:pathPrefix="/blog" />
    </intent-filter>
</activity>
Usage
Call the registerUniversalLinkCallback somewhere in the startup of your app. This Angular example puts it in the AppComponent's ngOnInit method to provide a callback method which will receive an Universal Link object every time your app is opened by a website link:
import { Component, OnInit } from "@angular/core";
import { registerUniversalLinkCallback } from "@nativescript-community/universal-links";

@Component({
  selector: "my-app",
  template: "<page-router-outlet></page-router-outlet>"
})
export class AppComponent {
  constructor() {}

  ngOnInit() {
    registerUniversalLinkCallback(ul => {
      // use the router to navigate to the screen
    });
  }
}
The universal link object has the following structure:
{
  "href": "https://www.example.com/blog?title=welcome",
  "origin": "https://www.example.com",
  "pathname": "/blog",
  "query": "?title=welcome"
}
There is also a getUniversalLink() method that will return the last universal link which opened the app. This is useful in scenarios where your app is protected by a login screen. Check if the user is authenticated and then navigate to the desired path.
import { getUniversalLink } from "nativescript-plugin-universal-links";

const ul = getUniversalLink();
Demos and Development
Repo Setup
The repo uses submodules. If you did not clone with --recursive then you need to call
git submodule update --initThe package manager used to install and link dependencies must be pnpm or yarn. npm wont work.
To develop and test:
if you use yarn then run yarn
if you use pnpm then run pnpm i
Interactive Menu:
To start the interactive menu, run npm start (or yarn start or pnpm start). This will list all of the commonly used scripts.
Build
npm run build.allWARNING: it seems yarn build.all wont always work (not finding binaries in node_modules/.bin) which is why the doc explicitly uses npm run
Demos
npm run demo.[ng|react|svelte|vue].[ios|android]

npm run demo.svelte.ios # Example
Demo setup is a bit special in the sense that if you want to modify/add demos you dont work directly in demo-[ng|react|svelte|vue]
Instead you work in demo-snippets/[ng|react|svelte|vue]
You can start from the install.ts of each flavor to see how to register new demos
Contributing
Update repo
You can update the repo files quite easily
First update the submodules
npm run updateThen commit the changes Then update common files
npm run syncThen you can run yarn|pnpm, commit changed files if any
Update readme
npm run readmeUpdate doc
npm run docPublish
The publishing is completely handled by lerna (you can add -- --bump major to force a major release)
Simply run
npm run publishmodifying submodules
The repo uses https:// for submodules which means you won't be able to push directly into the submodules.
One easy solution is t modify ~/.gitconfig and add
[url "ssh://[email protected]/"]
	pushInsteadOf = https://github.com/
Questions
If you have any questions/issues/comments please feel free to create an issue or start a conversation in the NativeScript Community Discord.